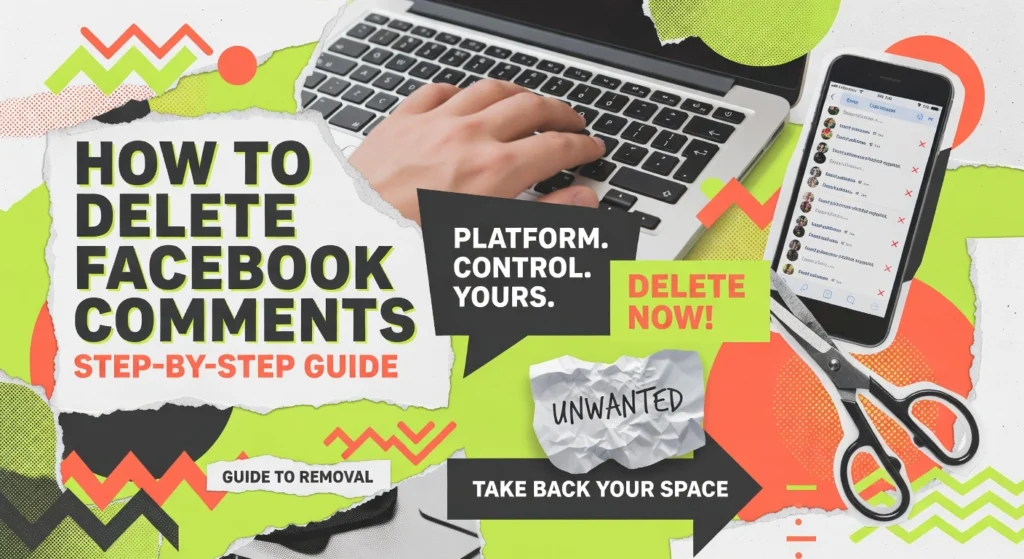
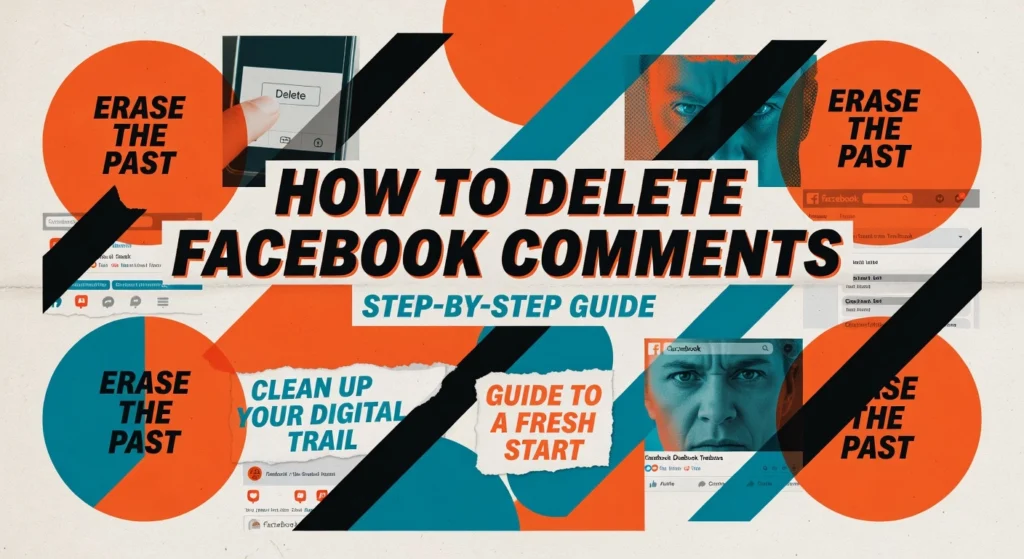
Author name: opinly

How to Delete a Tweet on Twitter: A Beginner’s Guide

Hit Tweet too fast? It happens. Maybe there is a typo, a photo you did not mean to share, or a take that does not land. The fix is simple, and you can do it in seconds. This beginner-friendly how-to shows you exactly how to delete twitter post on both the mobile app and the desktop site. We will walk through the steps to open your tweet, find the right menu, tap Delete, and confirm. You will learn what happens after a deletion, including what disappears instantly and what might still be visible for others who already saw or shared it. By the end, you will know how to remove tweets, retweets, and replies with confidence. You will see tips for avoiding common mistakes, how to double-check before you delete, and how to quickly find older tweets you want to clean up. No jargon, just clear instructions and screenshots you can follow in real time. Whether you are tidying your profile or undoing a quick misfire, this guide will help you make the right move fast and keep your timeline looking the way you want. Prerequisites: What You Need Before you delete a Twitter post, sometimes called a post on X, make sure you can sign in to your account through a browser or the official app. Double check you are on the correct profile, especially if you manage brand and personal accounts, and have any two factor codes ready so you do not get locked out. You also need a stable internet connection, ideally 10 Mbps or higher on Wi Fi or strong LTE, since a drop during deletion can cause the action to fail or make the tweet appear until the page refreshes. Test stability by loading your profile and refreshing your timeline; if media loads quickly, you are set. Finally, have a device ready with a modern web browser or the Twitter app installed and updated, desktop, iOS, or Android all work; updates can change where the Delete option appears. For a quick visual preview, watch How to Delete X Post History before you start. Step-by-Step: Deleting a Tweet If you need to delete Twitter post content, the process takes about two minutes and only requires the official app or a browser. Sign in and confirm you are on the right account, especially if you manage multiple brands. A stable connection helps the change reflect quickly. Remember that deletion is permanent and removes the tweet’s engagement metrics from analytics. If your team needs a record, capture a screenshot before you begin. Open the Twitter app or go to twitter.com, then log in with your username and password. Tap or click Profile, then scroll to find the tweet. Pro tip, use Search with from:yourhandle plus a keyword to jump right to it. On the tweet, select the three dots labeled More. Choose Delete Tweet to queue the removal. When the confirmation prompt appears, choose Delete again to finalize. After you confirm, the post disappears from your profile, timeline, and search within minutes. Native retweets are removed, while replies and quote tweets others made can still appear, they simply no longer link back to your original. Copies or cached pages may persist elsewhere. For bulk cleanup, see this trusted overview, the Consumer Reports guide to deleting tweets before authorizing any tool. When you want fewer cleanups and stronger results, Jesus Empire can guide smarter posting and review workflows. Implications of Tweet Deletion Deleted tweets are gone on the platform When you delete Twitter post content, it disappears from your profile and public timelines, and you cannot recover it through the app or web. Platform guidance indicates deletions are processed on a rolling basis, often within about 30 days, though interim backups may exist, see this overview of Twitter data policies. Once removed, you will not be able to view the original in your timeline or in search. If you plan to correct a mistake, consider deleting, then reposting a revised version to preserve clarity. But copies can live on elsewhere Deleted posts can persist in screenshots, web caches, and public archives. Screenshots often circulate long after deletion, as noted in this privacy explainer. Independent snapshots may capture tweets, with analyses finding many removed posts still discoverable, see this article on archived tweets. Example: a brand deletes an ill-timed post after ten minutes, but screenshots and quotes continue to trend. Before you delete, a quick 3-step check Materials, a screenshot or export tool; expected outcome, an informed decision with fewer surprises. Save your own record, export data or screenshot for internal accountability. Scan search results and social replies to gauge what copies might already exist. Decide your best path, delete, issue a correction, or post a transparent follow-up. For brands, this mindset supports privacy-aware workflows and smarter reputation management. Tips and Potential Troubleshooting Align decisions with strategy, and plan for persistence Before you delete a Twitter post, line up your prerequisites: your brand voice guide, the current campaign calendar, and a simple risk checklist. 1. Check strategic fit using that calendar, if the tweet promotes an expired offer or a discontinued feature, remove it to prevent confusion, a best practice highlighted in this Programming Insider overview. 2. Anticipate persistence, screenshots and web archives may keep copies, so keep a private log of what you deleted and why, and draft a brief holding statement in case the content resurfaces, a mindset supported by The Brand Hopper’s guidance on cleaning digital footprints. 3. Document what you will publish instead, for example, a corrected thread or an updated promo. Expected outcome: a cleaner feed, fewer mixed messages, and lower PR risk. Use tools to stabilize your content plan Materials needed: your last 30 days of post performance, a weekly content map, and access to Jesus Empire services. Apply this quick workflow, 1. Flag low-fit or high-risk posts for removal. 2. Repurpose high performers into threads or carousels. 3. Use Jesus Empire’s traffic services to amplify approved content and fill gaps in your …

How to Delete a Tweet on Twitter: A Beginner’s Guide Read More »

Mastering Instagram Reel Viewing: A Beginner’s Guide

Ever open Instagram for a quick peek and end up deep in a stream of short, catchy videos? Welcome to Reels. If you are new, it can feel fast, fun, and a little confusing. This guide is your friendly tour of the instagram reel viewer, the set of buttons, menus, and tricks that make watching smoother and more personal. By the end, you will know how to find Reels, use the viewer controls confidently, and fix your feed so you see more of what you like. We will cover tapping and swiping basics, turning sound on or off, captions and subtitles, liking, commenting, and saving for later. You will learn how to share a Reel, follow a creator from a video, and use the search and audio pages to discover new content. We will also show quick settings that help you manage data and screen time, and how to reset recommendations if your feed goes off track. Ready to scroll smarter, not longer? Let’s start with the simple steps and build up from there. Prerequisites and Materials Install or update the Instagram app on your smartphone. Open your app store and confirm you are on the latest version, which unlocks the Reels tab and creative tools. This matters because Reels content is massive, with over 2 billion people engaging monthly, according to these Instagram Reels statistics. After updating, tap the Reels play icon and test autoplay with sound. Build a basic feel for the interface. From the home screen, tap the Reels icon, swipe vertically to browse, and use the heart, comment, share, and save buttons to interact as an instagram reel viewer. Tap the audio name to see more clips with that track, and long press to enable captions. Try searching a hashtag to find niches you like. Secure a reliable internet connection for seamless streaming. Aim for at least 10 to 20 Mbps on Wi Fi or 4G for crisp playback. Reels are played over 200 billion times daily, so stable bandwidth helps avoid buffering, see daily Reels plays across Instagram and Facebook. If videos stutter, switch networks or close background apps. Step 1: Installation and Accessing Instagram Reels What you need You need a smartphone with internet, a bit of free storage, and access to Google Play or the App Store. Have your email or phone ready for verification. If you plan to use a business profile, keep your brand email and logo nearby. Enable two factor authentication after login for safety. Follow these steps Install Instagram: open Google Play on Android or the App Store on iPhone, search Instagram, tap Install or Get, then wait for the download. If you already have it, update the app so the Reels tab and creative tools are current. 2) Open the app and log in using your email, phone, or username with your password, or create a new account in minutes. Confirm any security code, then pick a recognizable username that matches your brand. 3) From the home screen, tap the Reels icon at the bottom center, the clapperboard symbol, to open the Reels feed. You can also swipe to the Explore tab and tap any Reel to view related clips. Outcome and why it matters Turning on Reels drops you into Instagram’s busiest format. Users watch over 200 billion Reels daily across Instagram and Facebook, proof your customers are already engaging there 2026 Instagram Reels statistics. Reels deliver about 22 percent more interaction than standard video posts and account for roughly 35 percent of time spent on Instagram 2025 Reels statistics overview. Watch a few clips so the algorithm learns your preferences, then, with Jesus Empire as your growth companion, you will be ready to create content that matches what your audience loves. Step 2: Finding Reels That Match Your Interests Before you start, have the latest Instagram app installed, a short list of topics you love, and 5 to 10 minutes of focused scrolling. The goal is simple, tune your instagram reel viewer experience so the app brings the right Reels to you. Reels are a major discovery surface, with industry reports indicating hundreds of millions of people watching daily, so small signals you give the algorithm matter. Expect results quickly, your Explore feed and Reels tab should feel more relevant within a day as you interact with content. For businesses partnering with Jesus Empire, these habits also prime your account for smarter engagement workflows later. Step 2.1: Use the Explore page to discover trending Reels Open Explore, tap the Reels grid, then sample what is trending in your niches. Interact with intention for 5 minutes, like, comment, save, or share only Reels you truly enjoy, and long press content you dislike to mark Not Interested. In 2026 Instagram added controls that let you choose topics and mute others, use these to personalize your Reels recommendations. Example, select Cooking, Travel, and Fitness, remove Pranks if that is not your style. Outcome, your Reels stream shifts toward your chosen categories, and you will see more creators that match your tastes. Step 2.2: Search using keywords and hashtags Tap the search bar and type natural phrases, for example budget travel reels, beginner calisthenics, or vegan meal prep. Instagram now indexes captions, on screen text, and even spoken words, which makes keyword queries powerful, see this overview on Instagram hashtags strategy and search behavior. Hashtags still help as category tags, use or explore 3 to 5 highly relevant ones like #DIYHomeCafe, #TravelHacks, or #GluteWorkout, rather than long hashtag blocks, more context here, social SEO keywords vs hashtags. Open a result, then swipe up to see related Reels and tap into similar creators. Outcome, precise searches surface niche content faster, and the algorithm learns the keywords you value. Step 2.3: Follow creators who produce engaging content When you find a great Reel, tap through to the profile, review several Reels, then follow if three or more resonate. Turn on notifications for Reels, and save standout posts into themed Collections like …

Mastering Instagram Reel Viewing: A Beginner’s Guide Read More »

Mastering Facebook Marketplace for Your Business

Ready to turn casual scrollers into paying customers? Facebook Marketplace is one of the fastest ways for small brands to reach local and national buyers, with low barriers to entry and strong intent. Whether you run a side hustle or a small shop, mastering the basics of a facebook marketplace business can help you list products faster, appear in more searches, and convert interest into orders. In this beginner friendly how-to, you will set up a compliant seller profile, choose the right categories, craft high quality photos, and write listings that sell. You will learn smart pricing, shipping versus local pickup, and how to handle messages efficiently. We will cover trust signals, reviews, and policies that keep your account in good standing. You will also see how to boost visibility with Promotions and ads, use Facebook Shops and inventory tools, read Insights, and create a simple workflow you can repeat at scale. By the end, you will have a clear checklist and practical steps to launch, optimize, and grow your presence on Marketplace with confidence. Understand the Basics of Facebook Marketplace What Facebook Marketplace offers Facebook Marketplace is a built-in hub where people buy, sell, and chat through Messenger, ideal for small brands testing demand quickly. It is available in more than 70 countries, and Facebook’s advertising reach is expected to hit 2.28 billion in 2025, which signals huge discovery potential. For a beginner running a facebook marketplace business, listings are free to post, and you can offer local pickup or ship nationwide. The environment is shifting toward privacy-first advertising and AI-driven personalization, so the sellers who structure listings clearly and respond fast will surface more often and convert casual browsers into buyers. Core features are simple to learn. You can upload high quality photos, write clear descriptions, set prices, choose categories, and publish in minutes, see the benefits of Facebook Marketplace for business. Marketplace emphasizes nearby results, yet shipping unlocks national exposure, as outlined in how to sell on Facebook Marketplace in 2025. Integrated Messenger enables direct, trust building conversations, reinforced in this overview of the power of Facebook Marketplace for small businesses. Ads can also run in Marketplace placements, the minimum ad spend starts around 0.80 dollars, and shipped orders often incur about a 10 percent seller fee, so plan pricing accordingly. Step-by-step basics for visibility and community Step-by-step to start strong: 1) Prerequisites, create or update your Facebook Page, enable Messenger, and outline two brand values you want shoppers to feel. 2) Materials, a smartphone camera or lightbox, pricing research, shipping supplies, and a short keyword list that matches how buyers search. 3) Create listings, lead with keywords in the title, add 3 to 10 well lit photos, and include size, condition, and pickup city. 4) Promote, A/B test photos and short video, run small Marketplace ads, and retarget engagers. 5) Engage community, reply within minutes, request reviews, join local groups, and showcase faith driven initiatives to build authentic trust. If you want help with creative testing, smart engagement, and compliant automation, Jesus Empire can manage the heavy lifting while you focus on fulfillment and service. Setting Up Your Business on Facebook Marketplace Prerequisites and materials Before you start, ensure you have a personal Facebook profile, a clear brand name, logo files in square format, product photos and videos, and a business email and phone number. Create your Facebook Business Manager and Page first, since Marketplace activity is tied to your Page and identity. You can follow this official-style walkthrough to set up Business Manager and your Page, including roles and permissions, using the step-by-step Business account guide. Keep in mind Marketplace operates in 70+ countries and Facebook’s ad reach is projected to hit 2.28 billion by 2025, making foundational setup worth the effort. Step-by-step setup Create your Business Manager and Page. Add your brand name, description, hours, and contact info, and upload a crisp logo and 1200×628 cover. Verify your business details, set Page usernames, and connect payment methods if you plan to run ads, the minimum spend can start at about $0.80. Go to Marketplace and create your first listing, or follow this Marketplace listing guide for categories and eligibility. Add 5 to 8 high-quality photos and one 6 to 15-second product video. Use a title like “Refurbished Dell XPS 13, i7, 16GB RAM, 512GB SSD” and list specs and benefits in bullets. Price competitively based on local comps. If you ship, factor the 10 percent seller fee on shipped orders into margins. Publish, then boost top performers with Marketplace ads. Build custom audiences and retarget visitors who messaged but did not purchase. Showcase, communicate, and automate Use natural light, neutral backgrounds, and hands-in-frame videos to prove authenticity, then test square and vertical creatives to diversify formats. Include dimensions, materials, condition, warranty, and pickup or shipping options, and add FAQs to the description to reduce chat friction. Aim to reply in under one hour using Messenger saved replies and an availability schedule, fast, professional responses lift conversion and Page ratings. For cross-channel setup and awareness, tools like Instagram Automator can help seed engagement insights that inform your Marketplace creatives. Jesus Empire can connect these steps with traffic services, smart engagement engines, and privacy-first audience building, so your facebook marketplace business is discoverable, compliant, and ready to scale. Product Listing Optimization Prerequisites and materials Gather a clear product spec sheet, your brand voice guidelines, and a simple keyword list that buyers might use to find your item. Prepare 8 to 12 high resolution photos and a 10 to 30 second video that shows the item in use, plus any past buyer quotes or screenshots that you have permission to share. Confirm price and shipping terms with room for the 10 percent seller fee on shipped orders, then outline pickup options and return policy. These basics help a Facebook Marketplace business publish faster and avoid repetitive edits that reduce listing momentum. Step-by-step listing optimization Craft titles and descriptions that do the selling. Lead with the essentials, …

Mastering Facebook Marketplace for Your Business Read More »

Mastering Twitter Advanced Search for Digital Growth

Stop scrolling blindly. With the right query, you can surface intent, trends, and prospects on Twitter in seconds. This how-to will show you how to turn search into a precise instrument using twitter search advanced search, the set of filters and operators that power Twitter’s backend search logic. By the end, you will know exactly how to combine operators like from:, to:, exact phrases in quotes, OR, minus exclusions, and filters for links, replies, media, language, and location. You will learn to bound time with since: and until:, set engagement thresholds with min_faves: and min_retweets:, and isolate conversations around hashtags, accounts, and URLs. We will cover query structure, common pitfalls, and copyable templates for tasks beginners care about, such as finding customers by intent, monitoring competitors, collecting content ideas, and saving reusable searches. Expect a practical, step by step workflow, clear examples, and quick validation checks so you can debug queries fast. Open Twitter, follow along, and start retrieving only the signals that matter. Understanding Twitter Advanced Search What Twitter Advanced Search does Twitter Advanced Search lets you filter tweets with high specificity using words, exact phrases, exclusions, accounts, hashtags, language, media type, date ranges, and engagement thresholds. With twitter search advanced search, you can turn vague queries into precise monitors. Operators like from:, to:, @mention, since:, until:, min_faves:, filter:links, and has:images shape queries that answer concrete business questions. The interface also supports minimum replies, likes, or retweets so you can spotlight posts with traction. For beginners, this means you can quickly surface mentions of a product, campaign, or service questions without scrolling timelines. See the interface and operator list in How to Use Twitter Advanced Search. Why precision matters in marketing analytics Precision is foundational to digital marketing analytics because query inputs determine data quality. Granular filters cut noise, sharpen segmentation, and make attribution and lift analysis more trustworthy. Evidence from ecommerce shows precision marketing improves targeting efficiency and conversions, see A Review of the Application of Big Data in Precision Marketing for E-commerce. Precision also enables intent based personalization across touchpoints, improving satisfaction and loyalty, see Big Reset: Marketers Use Precision Marketing to Drive the Data-Driven Customer Experience. At Jesus Empire, we treat advanced search syntax as instrumentation that directly shapes insights and spend. Step-by-step: build a precise monitor Prepare inputs, list your brand keywords and misspellings, handle, key locations, and campaign dates in a doc while signed in to your Twitter account. 2) Define entities, include brand and product terms with OR logic, for example, Jesus Empire OR “JesusEmpire”. 3) Add context, put exact phrases in quotes and exclude noise with minus terms, for example, “Jesus Empire” marketing -sermon -meme. 4) Target actors, add from:, to:, and @mentions to capture stakeholder and customer service threads. 5) Constrain time and quality, use since:, until:, and min_faves:10 or min_retweets:5 to focus on engaged posts within a window. 6) Localize and format, apply lang:en, optional geocode, and filter:links or has:images, then save the query, the expected outcome is a reusable monitor that surfaces hidden mentions, tracks sentiment, and quantifies campaign lift. Preparing for Advanced Searches on Twitter Prerequisites and tools Before you run a twitter search advanced search campaign, confirm the essentials and set up your toolkit. 1) Create or access a Twitter account, some filters are visible without login, but full Advanced Search access and saved searches work best when signed in, as outlined in the Bellingcat Advanced Search overview. 2) Use a desktop browser, Advanced Search is most reliable on desktop; keep it updated for performance. 3) Learn core operators to build precise queries, for example “exact phrase”, from:account, #hashtag, since:YYYY-MM-DD, until:YYYY-MM-DD, and minimum engagement filters like min_replies:50, see this guide to operators and use cases. 4) When composing complex logic, speed up with an AI-powered query builder that translates natural language into operator strings. The outcome is a repeatable query set that narrows noise, improves geotargeting, and accelerates tasks like brand monitoring, customer care, and partner discovery, which are core 2025 social strategies focused on audience growth, engagement, and analytics. Account setup and access Set up your account in a few steps. 1) Go to the sign-up flow, verify email or phone, and enable two-factor authentication for security. 2) Log in on desktop, enter a seed keyword in the search bar, press Enter, then open Advanced search from Search filters. 3) Populate fields methodically, Words for required and excluded terms, Accounts to specify from: and to: users, Filters for replies or links, Engagement to set minimum likes, replies, or reposts, and Dates for campaign windows. 4) Test queries with small time ranges, then expand as needed to maintain speed and clarity. Example: “shipping delay” OR “package late” -giveaway lang:en min_replies:5 since:2025-09-01 until:2025-10-01. Expect cleaner result sets aligned to your campaign objectives and faster insight extraction. Integrate with Jesus Empire tools Operationalize your findings with Jesus Empire. 1) Feed validated queries into the X/Twitter AI Agent to automate daily retweets, smart replies, and lead follow-ups based on your saved searches. 2) Use 4G and 5G Mobile Proxies to manage multi-account workflows safely and to test location-specific queries without risking flags. 3) Sync hashtags and keywords across channels, for example align #FaithInBusiness and partner prospecting lists with Instagram Automator for unified messaging. 4) Report weekly on mentions, sentiment, and engagement tied to each query, mirroring 2025 pillars for content, paid, and analytics. This integration turns search insights into consistent engagement and measurable pipeline growth. Step-by-Step Guide to Using Twitter Advanced Search Before you begin, confirm prerequisites, a logged in account and access to a desktop browser or mobile browser. Materials needed, your target keywords, a list of account handles, campaign dates, and any minimum engagement thresholds relevant to your KPI. Expected outcomes, a filtered stream of high intent conversations for brand monitoring, lead discovery, and hashtag tracking that aligns with your twitter search advanced search plan. For beginners, the process is repeatable, you will save searches and reuse them for weekly reporting. Keep a sheet ready to log …

Mastering Twitter Advanced Search for Digital Growth Read More »

Unlock the Power of Facebook Birthday Campaigns

Imagine turning a simple “Happy Birthday!” into your highest converting message of the month. People are already in a buying mood when their special day is near, and Facebook makes it easy to meet them with a timely nudge. In this guide, we will show you how to build Facebook Birthday Campaigns that feel personal, not pushy, and that win customers with small, smart touches. We will tap into facebook birthday reminders and simple ads so you can show up exactly when it matters. Here is what you will learn: how to set up your campaign in minutes, find people with birthdays coming up, choose an irresistible offer, write friendly copy that does not sound salesy, and automate delivery with Messenger or email. You will get quick templates, budget tips for even the smallest spend, and clear steps to measure results so you know what works. No jargon, no guesswork. By the end, you will have a repeatable birthday playbook you can launch each month and improve over time. Understanding Facebook Birthday Notifications What birthday notifications mean for marketers Facebook birthday notifications are the prompts that tell you a friend is celebrating today or soon. They appear in your notifications tab, in-feed cards, and the Birthdays hub, depending on privacy settings. For marketers and creators, these reminders are built-in conversation starters, people are already primed to connect, so your greeting, gift, or micro-offer feels natural rather than salesy. A simple facebook birthday message with a small perk can spark replies, comments, and shares that lift your visibility. Brands that consistently show up with sincere wishes and timely value earn goodwill that compounds over time. How Facebook surfaces birthday reminders Facebook prioritizes reminders that lead to meaningful interactions. The system looks at relationship strength, recent interactions, mutual friends, shared groups, and how often you engage with someone, then surfaces those birthdays first. Visibility always respects privacy, if someone hides their date, friends are not nudged. Because birthday posts trigger replies, stickers, and Stories, they often get prominent placement on the day, which reliably boosts engagement for friendly, human content. Professional Mode and visibility Professional Mode lets creators and entrepreneurs run a public-facing profile with audience insights and creator tools. When you publish birthday content or offers from a profile using Professional Mode, it can be discoverable beyond friends, which increases the chance that reactions and comments spread to wider audiences. Use insights to identify peak hours, top formats, and audience demographics, then tailor your birthday posts accordingly. The reach potential is huge, Facebook is at about 3.07 billion monthly active users in 2025, according to these Facebook statistics for 2025. Quick start: put it into action Prerequisites: a Facebook profile or Page, permission to post, basic brand voice. Materials: a short greeting template, brand visuals, optional promo code, scheduling tool. Expected outcome: higher day-of engagement, broader visibility, warmer relationships. Confirm birthday visibility and notifications. Go to Profile, About, Contact and basic info, set date visibility as you prefer. Enable Professional Mode if you use a personal profile for business. Open your profile, Menu, Professional Mode, turn it on, review settings. Draft a greeting and offer. Example: “Happy birthday, Sarah. Enjoy 20 percent off today with code BDAY20.” Schedule a post or Story for peak times your insights show. Add a clear call to action like “Comment ‘🎂’ to claim.” Engage in real time on the day. Reply within minutes, pin a top comment, add a celebratory Story sticker. Measure results after 24 to 48 hours. Check reach, comments, link clicks, and saves, then refine the next birthday post. Setting Up Your Birthday Marketing Strategy Step 1: Set goals and define your audience Start by aligning your facebook birthday campaign with specific business outcomes. For example, aim to lift 30-day repeat purchases by 12 percent or achieve a 25 percent birthday-offer redemption rate. Materials needed include your CRM or customer list, a consent-based birthday capture form, your Facebook Page, and an email tool. Segment customers by value, lifecycle stage, and interests, then map message tone and incentives to each group. The opportunity is large, Facebook sends over 1 billion birthday notifications monthly and roughly 45 percent of users make birthdays visible to friends, so your audience will likely encounter birthday content already. Step 2: Personalize messages and offers Collect accurate birthdates, preferred channels, and basic preferences via sign-up forms, loyalty enrollments, or post-purchase prompts, always with clear consent language. Create tiers, VIPs might get a free gift plus 20 percent off, new customers might receive a smaller discount with free shipping, and lapsed buyers could get a limited-time comeback bundle. Use the customer’s name, reference a recent purchase, and set a simple redemption window. Research shows personalized birthday emails often see higher open rates and conversions, and segmented automation can materially boost revenue, see this overview of birthday automations and performance benchmarks: Birthday and Anniversary Automations: Celebrating Your Customers. Expected outcome, more email opens, stronger click through rates, and clear lift in redemption. Step 3: Integrate social and email for broader reach Build an automation that sends an email at 7 a.m. local time on the birthday, then run a Facebook ad or post from two days before to one day after. Sync your CRM segments to Facebook custom audiences and mirror the offer in creative. Encourage shares with a branded hashtag and a simple UGC prompt, optionally offer a charity tie-in since Facebook birthday fundraisers have raised over 1 billion dollars. A or B test short video versus static images and vary discount framing, many users receive wishes on Facebook, so your content rides existing social momentum. If you use Jesus Empire’s engagement engines, schedule cross-channel posts and track redemptions in one view. Step 4: Protect privacy and stay compliant Obtain explicit consent for collecting birthdates, state the value, like a yearly gift, and allow easy opt out. Comply with GDPR and CCPA, link to your privacy policy, honor data subject requests, and log consent. Secure data with encryption, role …

Unlock the Power of Facebook Birthday Campaigns Read More »

How to Unfollow Unfollowers on Instagram Effectively

Ever notice your follower count drop while your following list keeps growing? It can feel like shouting into the void. If you want to unfollow unfollowers on instagram without drama or risking your account, you are in the right place. In this beginner friendly guide, we will walk through simple, step by step ways to clean up your follow list and focus on people who actually engage with you. You will learn how to spot non followers using Instagram’s built in tools, a quick manual check, and optional safe methods for tracking engagement. I will show you exactly where to look, how to pace your unfollows so you avoid action blocks, and how to organize a keep or unfollow shortlist. We will also cover basic etiquette, what to do before you unfollow a friend or brand, and the red flags to watch for with third party apps. By the end, your feed will feel lighter, your engagement will be clearer, and you will know how to maintain it in a few minutes a week. Let’s start making your Instagram follow list work for you. Prerequisites for Unfollowing on Instagram Before you unfollow unfollowers on Instagram, set yourself up for safe, efficient action. Instagram uses rate limits to curb spam, so keep unfollows to about 150 to 200 per day on mature accounts, and 50 to 100 on newer profiles, per this guide to Instagram unfollow limits. Pace yourself at 20 to 30 per hour and avoid rapid bursts to prevent temporary blocks, as noted in this summary of limits and penalties. Update the app to the latest version for stability and policy compatibility. Finally, switch to a Public profile so prospects can preview your content without requesting to follow. Prerequisites and materials: latest Instagram app, Public account, list of accounts to remove, and access to Jesus Empire’s AI-powered Instagram Automator. Confirm limits and plan batches of 20 to 30 unfollows per hour, staying under your daily max. Update the app, then relaunch Instagram. Set to Public: Profile, menu, Settings, Privacy, turn Private account off. In Jesus Empire’s Instagram Automator, choose Unfollow non-followers, enable throttling, queue a small test batch, and review results after 24 hours. Expected outcome: streamlined removals without action blocks, stronger account health, and more room for authentic engagement. How to Identify Accounts to Unfollow Prerequisites: switch to Professional account to unlock Insights; Materials: the Instagram app, a spreadsheet, and access to Jesus Empire’s tools. 1. Open Insights on your profile, then Audience and Content You Shared, and note posts with engagement rates under 2 to 3 percent, a sign of inactive followers. 2. Zero in on low interaction accounts by scanning the last 10 posts and Stories; followers who never appear in likes, comments, shares, saves or Story views for 30 days belong on a review list. 3. Cross-check, export or copy your follower usernames, then use a spreadsheet COUNTIF to compare against names engaged in the past month and flag zero matches. 4. For deeper analysis, use the AI-powered Instagram Automator by Jesus Empire and its Smart Engagement Engine, outlined here: How it works. Expected outcome: a clean shortlist to unfollow unfollowers on Instagram, protecting authenticity and reach as 2025 algorithms reward engagement. Step-by-Step Guide to Unfollowing What you need Before you unfollow unfollowers on Instagram, gather the basics: the Instagram app, a stable connection, and your shortlist of low-engagement profiles from Insights. For faster cleanup, have access to Jesus Empire’s Instagram Automator, which uses AI to mimic natural behavior and supports safe bulk unfollowing. Your expected outcome is a cleaner, more relevant feed and improved engagement rate, which supports Instagram’s 2025 focus on authenticity and quality interactions. Beginners often see a noticeable bump in story views and post interactions within a week as their feed and audience become more aligned. Keep a simple note or spreadsheet to track daily unfollow counts and avoid overdoing it. Steps Open Instagram and navigate to your followers list. Tap your profile, then check Following to see who you currently follow and who to remove. 2. Start unfollowing accounts with minimal engagement. Use Instagram’s Least Interacted With list to find 90-day low engagers, then remove mismatched or inactive profiles how this feature works. 3. Opt for gradual unfollowing to avoid flags. Newer accounts should keep to about 100 to 150 unfollows daily, established accounts up to 200. Work in batches of 20 to 30, pausing 30 to 60 seconds between actions safe pacing guidance. 4. Incorporate Jesus Empire’s Instagram Automator to bulk unfollow with custom limits, smart timing, and built-in safety. Set it to mirror your natural pace so you save hours while staying compliant. Tips for Maintaining Healthy Engagement Step-by-step to keep engagement healthy Prerequisites: switch to a Professional account, prep a simple content calendar, and enable Instagram Insights; Materials: the Instagram app, Story stickers, and access to Jesus Empire’s 4G Mobile Proxy; Expected outcome: steadier reach after you unfollow unfollowers on Instagram, more comments, and safer scale. 1. Engage daily by replying within 24 hours and adding two Story interactions weekly, like polls or question stickers, to trigger quick replies. 2. Post quality content that resonates, prioritizing short video and educational tips, a 2025 staple, and test one Reel and one carousel weekly. 3. For teams or multi-account workflows, use Jesus Empire’s 4G/5G Mobile Proxies to rotate real mobile IPs, improving account hygiene and reducing action blocks. 4. Monitor metrics in Insights, especially saves, shares, and 7-day retention; drop underperformers and double down on posts that drive profile visits. Troubleshooting Common Issues Fix limits and restrictions Prerequisites: Insights enabled and a recent backup of your follow list; Materials: the Instagram app and notifications on; Expected outcome: safe pacing with no action blocks. 1. If you get Action Blocked, stop unfollowing for 24 hours, then resume slowly. 2. Pace activity to no more than 10 unfollows per hour, a common ceiling noted here current hourly guidance. 3. Unfollow by hand inside the Instagram app to avoid terms violations, …

How to Unfollow Unfollowers on Instagram Effectively Read More »

Mastering Instagram Highlights: A Beginner’s Guide

Ever wish your best Instagram Stories could live longer than 24 hours? Highlights are your shortcut to keeping those moments front and center on your profile, so new visitors can binge your greatest hits anytime. Whether you want to showcase travel snaps, FAQs, or testimonials, Highlights make your profile feel curated and clear, even if you post on the fly. This beginner friendly how to will walk you through how to add highlights on instagram, step by step. You will learn how to create your first Highlight from your Story archive, how to add and remove clips, how to choose or design a clean cover, and how to rename and reorder for a polished look. We will also cover quick fixes when something is not showing up, privacy basics, and simple ideas for organizing by theme. By the end, you will have a profile that tells your story at a glance, and a repeatable process you can use in minutes. No fancy tools. Just your phone, a few taps, and a little creativity. Gathering Your Resources Prerequisites and materials Before you learn how to add highlights on Instagram, gather a few basics. Update your Instagram app, on iOS check the App Store updates tab, on Android check Google Play, this gives you the latest features. If you need a quick refresher, watch How to Add Instagram Story Highlights. Bring a phone with the updated app, a free Canva account, your logo files, and brand color hex codes. The outcome is simple, you will be ready to build clean, on brand Highlights without rework. Steps Collect or create engaging Stories, think behind the scenes, product demos, FAQs, and customer shoutouts. Carousels can reach engagement rates around 10.15 percent, so mix short clips and frames to keep viewers tapping. 2) Organize them into clear buckets like Products, Testimonials, FAQs, and Events to reduce friction and increase profile stickiness. 3) Design custom covers in Canva, search Instagram Highlight Cover, set 1080×1920, center a simple icon or logo, export PNG, upload as a Story, then set as the cover. 4) Align to brand identity, use exact hex colors and approved fonts, keep a mini style guide. For deeper tips, see Instagram Highlights: Everything You Need to Know in 2025. Creating a New Highlight Open Instagram and go to your profile, make sure Stories are saved to Archive so you can pull from them. 2. Tap the + icon under your bio in the Story Highlights area, then choose New to start a collection that keeps key Stories visible beyond 24 hours, a quick win when you are learning how to add highlights on Instagram. 3. Select as many past Stories as you like, focus on evergreen pieces like product walkthroughs, FAQs, testimonials, and event recaps, since 58% of users become more interested in a brand after seeing Stories, which means your Highlights can nurture warm traffic, see supporting data. 4. Choose a short, audience-first name such as Services, Before & After, Reviews, or FAQs, and add a clean cover to boost taps, you can quickly design on-brand covers using templates in this cover guide. Tap Done to pin the Highlight to your profile, review monthly and reorder as needed, and if you want to add Highlights from Archive without posting a new Story, follow this walkthrough. Editing Your Highlights If you already know how to add highlights on Instagram, here is how to refine them for impact. At Jesus Empire, we suggest ensuring your app is updated and Stories are saved to Archive, the outcome you want is a polished, on-brand Highlight that keeps visitors exploring. 1) Hold your finger on the Highlight icon you want to edit on your profile. 2) Tap Edit Highlight, then check or uncheck Stories to add or remove, trimming outdated clips and pinning your best tutorials, product shots, or testimonials. 3) To reorder for a cohesive story, clear the Highlight and re-add clips in sequence, for example Intro, Demo, Review, CTA, since Instagram displays by date. 4) Tap Edit Cover and upload a custom image that matches your colors, fonts, and logo so your grid looks tidy and clickable. Example, a café using Menu, Specials, Reviews can improve profile stickiness even as 2025 averages hover near 0.45 percent engagement, so clarity wins. Customizing Highlight Covers Before you think about how to add highlights on Instagram, prep your covers. Gather your brand colors, logo, and a simple icon set, plus the Instagram app and a free design tool like Canva. Keep relevance obvious, a suitcase for Travel, a cart for Shop, a star for Reviews, and limit text to 1 to 3 words. Aim for consistent colors, fonts, and spacing so your row of circles reads like a brand kit. With average Instagram engagement around 0.45 percent in early 2025, polished Highlights help your profile stand out. At Jesus Empire, we also recommend high contrast for accessibility. Quick steps In Canva, open an Instagram Story canvas, 1080 by 1920, set a brand background, then center a clear icon inside the invisible circle. Export as PNG and save to your camera roll. On Instagram, open your profile, long press a Highlight, tap Edit Highlight, tap Edit Cover, pick your PNG, pinch to fit the circle, tap Done. Repeat for each Highlight to keep a consistent set, then preview on different phones for legibility. Expected outcome, a clean, on-brand navigation bar that leads viewers to evergreen stories and improves taps and time on profile. Using Highlights for Business Strategy If you already know how to add highlights on Instagram, use them like mini landing pages for launches, promos, and culture. Create a New Arrivals or Deals highlight so followers find offers fast, and refresh weekly. Mix product teasers, FAQs, carousels, and short how tos to outperform typical 0.45 to 2.0 percent engagement. Add branded covers, and group content into Products, Tutorials, Reviews, and Events. Prerequisites: enable Story Archive, gather promo codes, BTS clips, customer quotes, logo files, and simple cover …

Mastering Instagram Highlights: A Beginner’s Guide Read More »

How to Create Engaging Instagram Highlights Easily

Ever wish your best Stories could live on your profile longer than 24 hours? Good news, they can. Instagram Highlights let you pin your favorite moments right under your bio, so visitors see them first. If you are a beginner and wondering how to make a highlight on instagram, you are in the right place. In this quick, beginner friendly guide, you will learn exactly how to create your first Highlight in minutes. We will cover how to save Stories to your archive, turn a live Story into a Highlight, add older Stories, rename and reorder clips, pick a cover image, and edit or delete when you need to. You will also get simple design tips for clean covers, easy theme ideas for personal accounts and small businesses, and smart tricks to keep viewers tapping through. No tech jargon, just clear steps you can follow right away. By the end, your profile will look more polished, and your best content will keep working for you long after the 24 hour timer runs out. Ready to start? Prerequisites and Materials Phone and app setup Before we dive into how to make a highlight on Instagram, grab a smartphone with Instagram installed and up to date. On your profile, open Settings, Privacy, Story, and turn on Save story to archive. This stores every Story so you can build Highlights from past moments and keep them visible beyond 24 hours. New to the feature? See how Instagram Highlights work in this quick primer: how Instagram Highlights work. Stories and optional design tools Have a few Stories ready to choose from, recent or archived. Think clear categories your audience actually wants, like FAQs, Reviews, Before and After, or Menu. Stories have 500 million daily users, so Highlights can turn visitors into followers by showcasing your best bits. Optional, design clean cover icons at 1080×1080, use brand colors, and center simple graphics so they crop cleanly. When ready, you can create a Highlight from your profile in under a minute with these steps: create a Highlight from your profile. Running a business? Jesus Empire’s Instagram Automator and 4G Mobile Proxy help keep posting consistent while you focus on creative. Step-by-Step Guide to Creating Instagram Highlights Start and select With your app ready, if you are wondering how to make a highlight on Instagram, you can do it in minutes. 1. Open Instagram and go to your profile using the bottom right icon. 2. Tap the New circle with the + under your bio to start a Highlight. 3. Pick past Stories from your Archive, tap each to checkmark, then hit Next for a preview. Aim to select 5 to 10 clips that tell one mini story, for example a product launch or event recap. Stories reach 500 million daily, and Highlights keep top moments alive. Name and design Name your Highlight so the theme is obvious, keep it short so it does not truncate, examples: Menu, Reviews, BTS, Events. 5. Tap Edit Cover, choose a frame from a Story or upload a clean 1080 x 1080 image with a simple icon and brand colors. Center the focal point and test legibility on dark and light mode. Align covers so the first row reads like navigation. Expected outcome: a tidy button on your profile that visitors can tap to binge key content. Pro tip from Jesus Empire: refresh Highlights monthly and add customer testimonials for extra trust. Customizing Highlights for Business Impact Align cover icons with brand aesthetics Prerequisites: brand colors and fonts handy, logo file, and a simple icon set. Materials: a design app and your existing Highlights. 1. Pick 2 to 4 brand colors and one font, then design clear icons for each category. 2. Export 1080×1080 covers, then upload in Edit Highlight; see aesthetic Instagram highlight cover ideas for examples. Showcase products and customer testimonials Create Highlights like Products, Tutorials, and Love from Customers. 4. Add shoppable Stories, quick demos or Reels snippets, and short CTAs to tap Link. Stories reach over 500 million accounts daily, and UGC drives about 42 percent of viral posts. For layout and testimonial ideas, study this guide to Story Highlights for brand trust. Organize Highlights for a seamless user experience Order Highlights by goals, for example Start, Products, FAQs, Testimonials, Events. 6. Keep each under 20 to 30 Stories, pin the best, prune monthly, and expect smoother navigation. Design refreshes lifted Highlight views by 22 percent, see design led Instagram transformations. Jesus Empire’s Instagram Automator and smart engagement engines help you queue Stories and keep Highlights fresh. Tips and Troubleshooting Common Issues Keep Highlights fresh and uncluttered Prerequisites and materials: Archive on and simple themes defined, plus your current Highlights list. Post Stories weekly so you always have new material to pin, remember over 500 million accounts watch Stories daily, so freshness boosts discovery. Curate by theme, for example New Arrivals, FAQs, Testimonials, then move only top clips into Highlights from Archive. Keep it tidy, aim for 5 to 7 Highlight albums and cap each album at roughly 15 to 20 Stories, audit monthly and remove outdated slides. Reorder by press and hold to put your highest value categories first so visitors quickly grasp your offer and your how to make a highlight on Instagram workflow stays simple. Fix display issues fast Expected outcome: Highlights load and attach new Stories correctly. Try these steps. 1. Update Instagram in your app store to get the latest fixes. 2. Clear cache, Android, Settings, Apps, Instagram, Storage, Clear Cache; on iOS, offload the app and reinstall. 3. Restart the phone and verify a stable Wi Fi or mobile data connection. 4. If problems persist, reinstall and review this quick tutorial, Instagram Highlights Not Working? Easy Fix in 2024!. Leveraging Instagram Automator to Optimize Highlights Smart scheduling for Highlight updates Prerequisites: an Instagram business account, Story archive on, and access to Jesus Empire’s Instagram Automator. 1) Map 4 goal based Highlight categories, then batch 8 to 12 short Stories so …

How to Create Engaging Instagram Highlights Easily Read More »

Master Unfriending on Facebook: A Step-by-Step Guide

Ever scroll through your feed and think, I barely know this person, why am I seeing their vacation pics again? If you have been hesitant to clean up your friend list, you are in the right place. This beginner friendly guide will show you exactly how to use the facebook unfriend option without the stress or confusion. In this how to, you will learn the simple steps to unfriend someone on Facebook on iPhone, Android, and desktop. You will also find out what happens when you unfriend someone, whether they get notified, and how to refriend them later if you change your mind. Not sure if unfriending is too final? We will explain the difference between unfollowing, restricting, and blocking, so you can choose the right move for your situation. By the end, you will feel confident trimming your friend list, keeping your feed focused on people you actually want to hear from. No tech jargon, just clear steps and quick tips to make your Facebook feel like yours again. Let’s tidy up that timeline, one tap at a time. Understanding the Importance of Facebook Unfriending Unfriending on Facebook is a simple act with big payoffs for digital self-care. Think of it as spring cleaning for your mind and feed. Quick starter plan: 1) Set an intention, for example reduce misinformation or drama. 2) Open Facebook and scan your recent feed for posts that spike stress, anger, or distraction. 3) Choose the right action, Unfollow or Snooze if you only need a break, Unfriend if the connection consistently harms your experience. 4) Remember, Facebook does not notify the person you unfriend, so you can act without confrontation. Expect a calmer feed and more relevant posts, a trend supported by findings that many users unfriended during the pandemic to protect information quality Users’ motivations study. Unfriending also declutters your digital space, which helps Facebook’s algorithm show you content that actually serves you. Research on defense tools against abusive friends shows users overwhelmingly accept recommendations to limit or remove harmful connections, signaling strong benefits for feed hygiene AbuSniff research. For mental health, curating connections aligns with digital well-being guidance that associates smarter feature use with reduced psychological symptoms digital well-being study. Prerequisites are minimal, a clear goal and five minutes per week. Expected outcomes include lower anxiety triggers, fewer unhelpful debates, and a feed that supports focus, which is especially helpful for entrepreneurs growing with Jesus Empire. Prerequisites for Unfriending on Facebook Quick pre-checks Before you tap facebook unfriend, make sure your setup will not interrupt the process. First, confirm a stable internet connection, switch to reliable Wi-Fi or ensure at least three bars of LTE to avoid incomplete actions. Next, update the Facebook app to the latest version since outdated builds can glitch or miss security fixes. Keep your password ready in case a session timeout prompts a fresh login, and if you forgot it, follow the official steps in the Facebook Help Center. For extra safety, use a strong unique password, see secure your Facebook password, and stay alert to suspicious friend requests that could be scams, outlined in friend request hacker trap explained. Internet: Load two sites or a speed test; if pages lag, reconnect or move closer to your router. Update: Open your app store, search Facebook, tap Update, then relaunch the app. Access: Log in to confirm credentials; note your recovery email or phone for resets. Expected outcome: a smooth, private unfriend action with no errors. Materials: reliable connection, updated app, password or recovery access. Step-by-Step Guide to Unfriending on Facebook Navigate to the friend’s profile you wish to unfriend. Open Facebook on desktop or in the mobile app, then use the search bar to type their name and select the correct profile. If there are several matches, confirm with the profile photo and mutual friends to avoid removing the wrong person. You can also open your Friends list and search there, which helps if the person recently changed names. Deactivated profiles still appear in your Friends list, so you can remove them too. Locate the ‘Friends’ button underneath their name. On desktop, it sits below the cover photo beside Message and Following. On mobile, it appears below the profile picture and name. If you see Add Friend instead, you are not currently connected, so no further action is needed. Click or tap Friends to open the menu for that person, then pause a moment to ensure you are on the right profile. Click Unfriend and confirm your decision on the pop-up alert. Choose Unfriend from the menu, then approve the confirmation prompt to finalize. The expected outcome of a facebook unfriend is immediate removal from your friends list, and Facebook does not send a notification to the other person. They could notice later if they visit your profile or try to interact. If your goal is only to reduce noise, consider Unfollow or Snooze, which keep the connection while hiding posts. Pew research has found that about 63 percent of profile owners have deleted people from their networks, a reminder that curating your list is common and healthy. If you prefer to keep ties, the next section covers lighter options. Maintaining an Engaging and Productive Facebook Feed Prerequisites and quick setup Give yourself 10 minutes, update the Facebook app, and set a simple goal like reduce political noise or promo clutter. Open your Friends list and News Feed to review what you actually see. Strong social ties usually show frequent chats and reactions across channels, weak ties do not, see research on strong and weak ties. Values matter, surveys suggest roughly 44 percent of users unfriend over offensive comments, so let clear standards guide you. Audit engagement for the last 30 days, flag people you have not messaged, reacted to, or seen offline, and note pages that feel irrelevant. Use the lightest fix first, Unfollow or try a 30-day mute with Snooze to reduce noise without ending the connection, see Facebook’s 30-day Snooze feature. Unfriend …

Master Unfriending on Facebook: A Step-by-Step Guide Read More »

Maximize Birthday Engagement with Facebook Ads

Imagine showing the perfect offer to someone right as they plan a birthday surprise or pick a party outfit. That is the magic of Facebook Ads for birthdays. If you are new to ads or just curious about birthday facebook strategies, you are in the right place. In this how-to guide, we will walk through simple steps to reach people with upcoming birthdays and their friends on Facebook. You will learn how to find the right audience, set up a campaign without getting lost in the dashboard, choose a budget that makes sense, and pick ad creatives that feel personal without being pushy. We will cover timing, like when to start your ads for best results, and what to say in your copy to spark clicks and comments. You will also see how to measure what works, so you can improve each week. By the end, you will have a clear plan to boost engagement around birthdays using Facebook Ads, even if this is your first campaign. Let’s make those celebrations work for your brand. Gather the Necessary Prerequisites and Materials Get access to a business Facebook account for ad creation Start by setting up or confirming access to Business Manager so you can run birthday Facebook ads. Do these in order: 1) Go to business.facebook.com and create your account, 2) verify business details if prompted, 3) create an ad account with the right time zone and currency, 4) add a valid payment method, and 5) grant Page and ad permissions to your team or to Jesus Empire if we are assisting. For a quick visual walkthrough, use this guide: How to Setup Facebook Business Manager and Ad Account the Right Way. Expected outcome: a ready-to-use ad environment with clean permissions and billing that prevents launch delays. Compile customer data for targeted birthday promotions You need accurate birthdays and consent. Implement these simple steps: 1) add a birthday field to sign-up and checkout forms, 2) build a preference center so customers can update dates, 3) collect birthdays during loyalty signups, and 4) send post-purchase prompts with a small incentive. Incentives work, so offer a 10 percent coupon for completing profiles, as suggested here: 6 Strategies for Collecting Customer Data for Early Personalization | Xeno’s Resources. With 72 percent of parents influenced by social ads for party decisions, clean birthday data directly fuels conversions. Expected outcome: a permission-based birthday segment ready for tailored offers. Identify creative resources for your ad posts Prepare a mini asset kit: square and vertical images with birthday motifs, 6 to 15 second video loops showcasing the offer, and copy variations that personalize tone and urgency. Test AR-style frames, confetti motion, or quick recap videos, since short, optimized creative wins in 2025. Plan to target people with upcoming birthdays, as outlined in Facebook Targeting: 4 Ideas to Target Upcoming Birthdays. Expected outcome: scroll-stopping creatives that lift CTR and lower cost per result, ready to deploy in your first test set. Step-by-Step Guide: Setting Up Facebook Birthday Ads Before you start Bring a simple birthday offer, for example 20 percent off or a free gift, plus 1 to 2 images or a 10 to 15 second video and a valid payment method to power your birthday Facebook ads. Expect quick engagement because birthdays are personal and time sensitive. Social ads influence buying, and 72 percent of parents consider them for birthday services. Install your pixel if available and note locations and ages. Jesus Empire can help polish creative and automate replies so you do not miss warm birthday leads. Step 1: Access Ads Manager and start a new campaign Log in to your business Ads Manager and click Create to start a new campaign. Name it Birthday Reach Test, choose a daily or lifetime budget, and set the schedule for at least 7 to 14 days to capture multiple upcoming birthdays. Use Advantage+ placements unless you have strict brand rules. Save the draft and move to the ad set level. Keep simple notes on what you test, such as offer A versus offer B. Step 2: Choose Reach for broad visibility Select the Reach objective under Awareness to maximize unique views across your audience. For a refresher, see the official overview, Meta objective overview. Add a frequency cap to prevent fatigue, for example 1 to 2 impressions every 7 days, a best practice covered here, Reach objective tips. Start with 10 to 20 dollars per day and monitor unique reach and saves. Your outcome is broad visibility for time bound birthday offers, not deep optimization yet. Step 3: Target birthdays precisely At the ad set, open Detailed targeting, then Demographics, Life events, and choose Upcoming birthday to reach people with birthdays next week. For monthly promos, pick Birthday in [Month]. To drive gift purchases, layer Friends of people with upcoming birthdays. Step by step screenshots are explained here, Birthday ad targeting guide. Use celebratory copy and a clear CTA. Adidas showed birthday triggered messaging can lift sales, and a free treat offer has boosted restaurant bookings. Tips and Troubleshooting for Effective Campaigns Before you tweak anything, set your prerequisites. Have a clear birthday offer, at least two image variations and one vertical video, and a small test budget split across ad sets. Prepare a simple audience plan that includes Facebook’s “upcoming birthdays” segment and your warm audiences. Your expected outcomes are higher click rates, more redemptions, and goodwill, since birthday Facebook campaigns tap into intent. Real brands have seen big lifts, like birthday-triggered promos driving sales spikes, and one local promo offering a birthday freebie boosted orders. Aim for incremental wins week over week rather than a one-day splash. 1) Personalize messages and images to enhance engagement Keep copy warm and occasion based, for example “Happy Birthday Month, enjoy 20% off.” Avoid using personal attributes like names. Pair copy with vertical 4:5 or 9:16 creative so your ad occupies more mobile screen space, and keep text on images minimal. Mix studio shots with authentic UGC to build …

Maximize Birthday Engagement with Facebook Ads Read More »

Scroll to Top